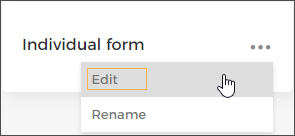
Edit form
To edit form fields, click Edit in the more options menu of a form. Alternatively, you can click on a form to be able to edit it.
 |
On the resulting page, you will be able to configure form fields at the checkout as well as defile fields for collecting information per visitor.
Fields for the checkout
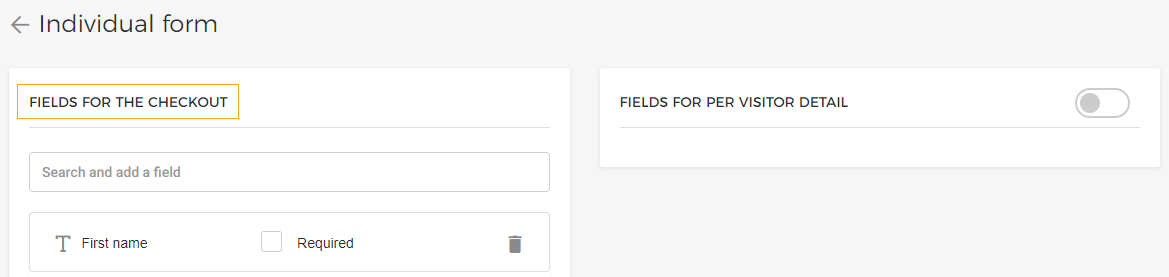
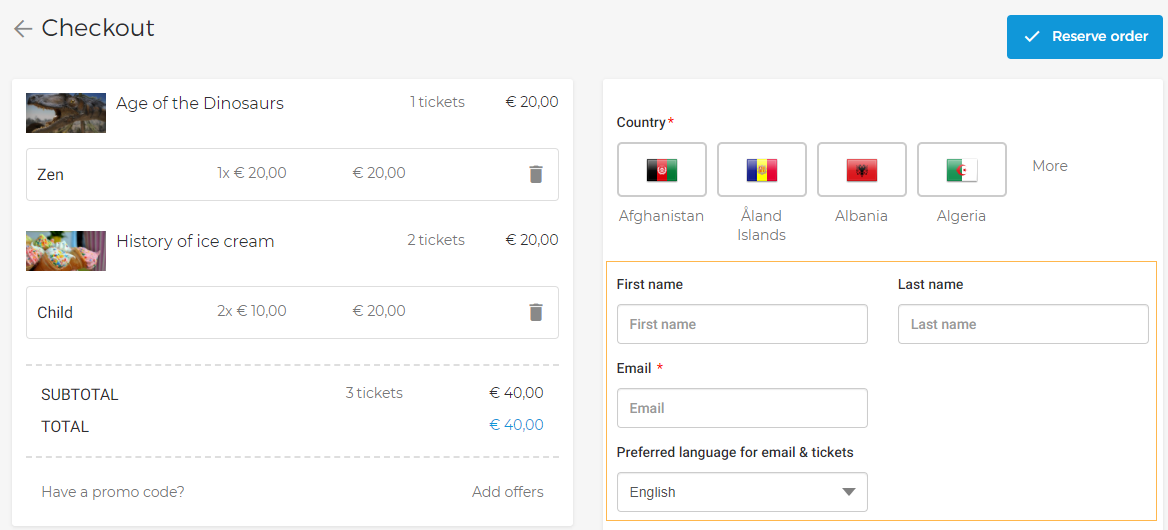
The fields defined for the checkout will show at the checkout stage of placing an order on a direct channel sales point.
Fields for per visitor detail
If enabled, you will be able to configure fields that will be shown for each visitor.
Note
For the users of Enviso's Ticketing widget, if the parameter 'Fields for per visitor detail' is enabled and the details have been filled in at the time of checkout, you can consult the visitor details from the exported order file. However, if not using the Ticketing widget we recommend to DISABLE this parameter.

Add a field
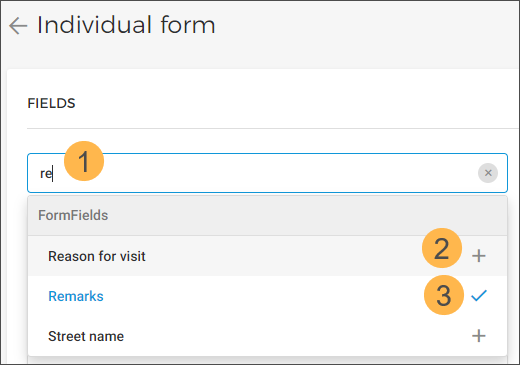 |
In the search box, enter the field name that you wish to add in the form.
Click the add icon to add that field to the form.
Note a blue tick appears next to the selected field. Also, the selected field will be added to the form.
Note
It is not possible to change the sequence of the form fields. As you add a field, it will populate one after the other and form a sequence.
There are certain fields for collecting generic information such as visitor's name, address, contact information and so on, whereas certain other fields such as email of finance division, purchase order, school name, etc. can be used for specific scenarios.
Remove a field
Click the delete icon next to the field which you wish to delete for a form.
 |
Note
The fields Email and Country cannot be deleted because they are are mandatory fields by default.
Mark a field as required
When you mark a field as required, it will be mandatory for the user will fill that field in the form.
 |